- Lee Pengelly
- Mar 19
- 7 min read
Photography has been a part of my life since my early twenties, but my relationship with it has evolved in unexpected ways. I started my photographic journey shooting with film cameras back in the early nineties, using a Pentax ME super originally then progressing on to a Pentax 67 then later an old MPP 4x5 field camera. I also spent a brief period at college studying photography and the processes involved in the darkroom.
By 2000 I had taken the plunge and started full time as a pro photographer, ( I hate that tag, but I was earning my living with the camera so I guess this describes it). With this transition I had to invest in digital cameras, as that is what the industry demanded, and film took a back seat for the best part of 24 years.
Fast forward 30 plus years later from those early days, and I am once again immersed in the world of film photography. I had missed film and found myself drawn back to the tactile, hands-on process of it. The hunt for the image has always been the same but the whole process of shooting film, (no idea what it looks like at capture and having to wait for the results), I had missed. I stepped away from 'professional' photography back in 2017 so now I shoot for pure pleasure. I do sell my work in various forms but ultimately not having to make each image a 'seller' has freed up my vision no end.
I got back into film shooting with a 6x17cm camera initially, then added a TLR and later a Bronica SQA 6x6cm camera. From here I was eager to go bigger and invested in a Shen Hao 4x5" camera. Bigger is definitely better !. More recently I was gifted a Wisner 8x10" camera, a beautiful wood and brass camera. The images form this beast of a camera are truly an inspiration.
For the past year and a half I have been enjoying shooting with film to the point where I rarely use a digital camera now. I have also been enjoying processing and scanning my own film. In August last year we put the house on the market and started our search for a new home. This led me to start planning something I had wanted for a long time - my own traditional darkroom space. We eventually moved in late December last year and luckily I had some space for my plans to come to fruition.
This is my build story.

notes & plans
Now, a normal sized garage in the UK is around 5m x 2.5, not a huge space granted and impacting my original plan was the need for a workshop/storage space here too. So my plans were for a darkroom space 3.5m long x 1.5m wide. This had to include worktop space, cupboards and of course the enlarger - more on this later !
I flat planned the space broken down into two distinct areas - a wet area/workspace and an enlarging area
Meticulous planning ensued until I was happy with the layout and size.
the shell
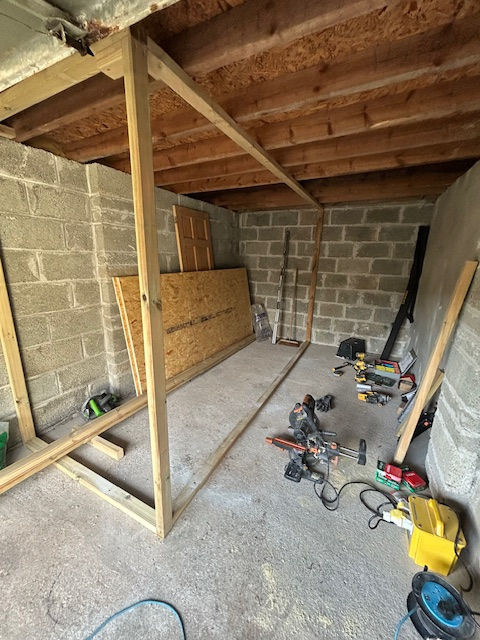
For the main structure I used 4x2" timbers and 22mm OSB construction board, ( I had to have something practical for the workshop/store side of the garage). This was framed out with the intention of adding a door at the farthest end then completely encapsulated making it easier to create a light tight space.
With the main structure in place I then went about laying in cabling for both sockets and lights. 3 double sockets with two above the main workspace and one lower one for heating and the enlarger.
The garage had no electrical or water supply so I first had to route a 10mm armoured cable from the house up to the garage - no mean feat !. Later we had both the house consumer unit replaced and an additional one fitted in the garage with dedicated fuses for power and lights plus EV charging capability. The most challenging aspect of the build was getting a water supply routed up. I laid a alkathen supply pipe from the house, tapped into the main supply, under two concrete paths and under the front garden to the darkroom. A challenging process to say the least. A cold supply only as I can regulate water temperature with a water bath. Later on I can also retro fit a water heater or electric shower if I need to. Waste water is linked to the main sewer and nasty waste chemicals are stored for disposal.
Lighting was pretty straightforward, 1 main light in the darkroom and 1 in the workshop area, both with separate switches.

Next on the list was insulating the ceiling and wall voids with cellotex boards and then drywall. I also created a floating floor from 50mm cellotex, ply lined and the click flooring on top. This would make the space warm in Winter and cool in the Summer.
Once the walls, ceiling and floor were done things really started to take shape.
I fitted a small extractor fan in the ceiling plus a passive vent in the end wall. This passive vent is basically an internal vent with an external vent on the external wall, and a light proof channel running between the two. This would give me clean fresh air plus the extractor for any fumes.
A small electric wall heater was then installed to maintain a constant temperature in the space.

Next the cabinets and worktops. I fit kitchens and bathrooms in real life now and I had some old units from a rip out that I stored away for this very day. These units have an aluminium wrap on the doors, very handy to keep clean. With two top cupboards, a drawer unit and added shelving under I have found I have plenty of space for all the bits and pieces I need.
Lastly a main length of worktop which would be my main working surface with a small catering sink at the farthest end. I had to modify the sink slightly to fit a tap which has a shower head attachment for washing prints and trays. This has proved to be an invaluable addition.

It was then time to start installing the finishing touches including a rubber 1.5mm thick mat to the side of the sink for squeegeing prints off. I also fitted a safelight above the working area. But one thing was missing !!
the enlarger hunt
An important piece of equipment to finish off the project, the enlarger !. Initially I was on the hunt for a 8x10 enlarger but the more research I did the quicker it became apparent that I did not have enough ceiling height for such a beast, (unless I took the garage roof off !!).
Eventually I found a couple of 4x5" enlargers on Ebay and settled on a beautiful Chromega with a colour head and control unit.
This enlarger would handle my 4x5" work plus 6x6cm, 6x9cm, 6x7cm and 35mm later on. A five hour round trip and she was back in the room. Now here lies a tale !.

Originally I was going to carry the worktop around the corner where the enlarger sits but after much measuring and re-measuring I realised it would not fit height wise. So some alterations ensued taking out half of the base corner unit to accomodate a dropped platform. I was concerned that this might be a pain in practice as it was lower than the main worktop but having had a few sessions in the darkroom I am pleasantly surprised. It works like a dream.
The enlarger has dial in contrast filters and it's own dedicated timer unit which make printing so much easier. The large baseboard will do up to 20x16" prints and later I plan to make an extended board so I can go up to 20x24".
the first sessions
Many hours have already been spent tinkering away in the space. Initially I made some test prints to fine tune the enlarger adjustments, check for any fogging issues, light leaks etc. All was good on this front.
So then I began printing for real.
Although I can't make enlargements from my 8x10" negatives I can produce contact prints, which look absolutely superb. Rather than buy a contact printing frame I have made my own which is basically a piece of 6mm float glass taped with photo black out tape. I can use this to produce white bordered contact prints up to 11x14" paper size.
Everything is being recorded in note books and on the backs of test prints so I will have working formulas for what I'm producing.
The working area is ok, a few tweaks might be necessary down the line but overall the space is enough, even using 16x12" trays initially. Hanging space is minimal at present but enough. I have options to add more if needs be.
what's next ?
If you follow me on Instagram and YouTube you will probably see that I'm already hooked on all things darkroom. It is very addictive but more than that it gives me complete control from capture throught to print.
I am keen to start contact printing my 8x10" work and print up to 20x16" from my 4x5" negatives. At some point I want to create a new gallery/shop page on the website for my hand printed work.
Producing video footage of me working in the space is a challenge so I am currently testing out some options to enable me to do this.
I am also looking into dry and wet plate photography and keen to get stuck into this. I have some long term projects which I would like to take from capture to print and this will undoubtedly follow on my YouTube channel.
am i done with digital ?
Well yes and no, I still own a digital camera, two in fact. My main Nikon ZFC which is used mainly for recording my videos and as a travel stills camera. I also still have my full spectrum converted Canon M50 which I love.
There is also the Epson V850 scanner, a formidable piece of kit which will still be used to scan my film work.
Never say never, but for now I feel like I've found my happy place as far as shooting film goes, and to be able to now produce prints from my work has given the whole process that extra edge.
